Product Photography with Ring Light
Scope
Purpose: Product Photography with Ring Light sets one standard for every product photograph SpringNE takes. Photography staff prepare the garment, shoot it under the ring light in the correct zone, and the Visual Content Supervisor approves the result against a quality checklist. Consistent lighting, hangers, background, and camera angle keep every sample image comparable.
Owner: Visual Content Supervisor.
Applies to: Photography staff, the Visual Content Supervisor, the Studio Coordinator, and the factory Product Developer (PD) who photographs a Development Sample (DS).
Process
-
Studio Coordinator — Prepare the photography space. Keep the studio organised and every piece of equipment available and working before a session starts.
- Check the ring light, the wooden hangers, and the white background.
- Keep the layout guide and the reference material within reach of the photography staff.
-
Photography staff — Prepare the product. Photograph a medium (M) garment only, because size M represents the fit and the proportion most accurately.
- Clean and iron the garment completely.
- Remove every sample tag, note, sticker, and product code. None of them may appear in the photograph.
- Reject a garment that stays wrinkled, stained, damaged, or out of shape, and adjust the sleeves, collar, hem, and seams before shooting.
-
Photography staff — Hang the garment. Use a clean, undamaged wooden hanger and nothing else.
- Let the hanger carry the garment naturally. A hanger that stretches or distorts the shape changes the product.
- Hang the garment neatly and symmetrically.
-
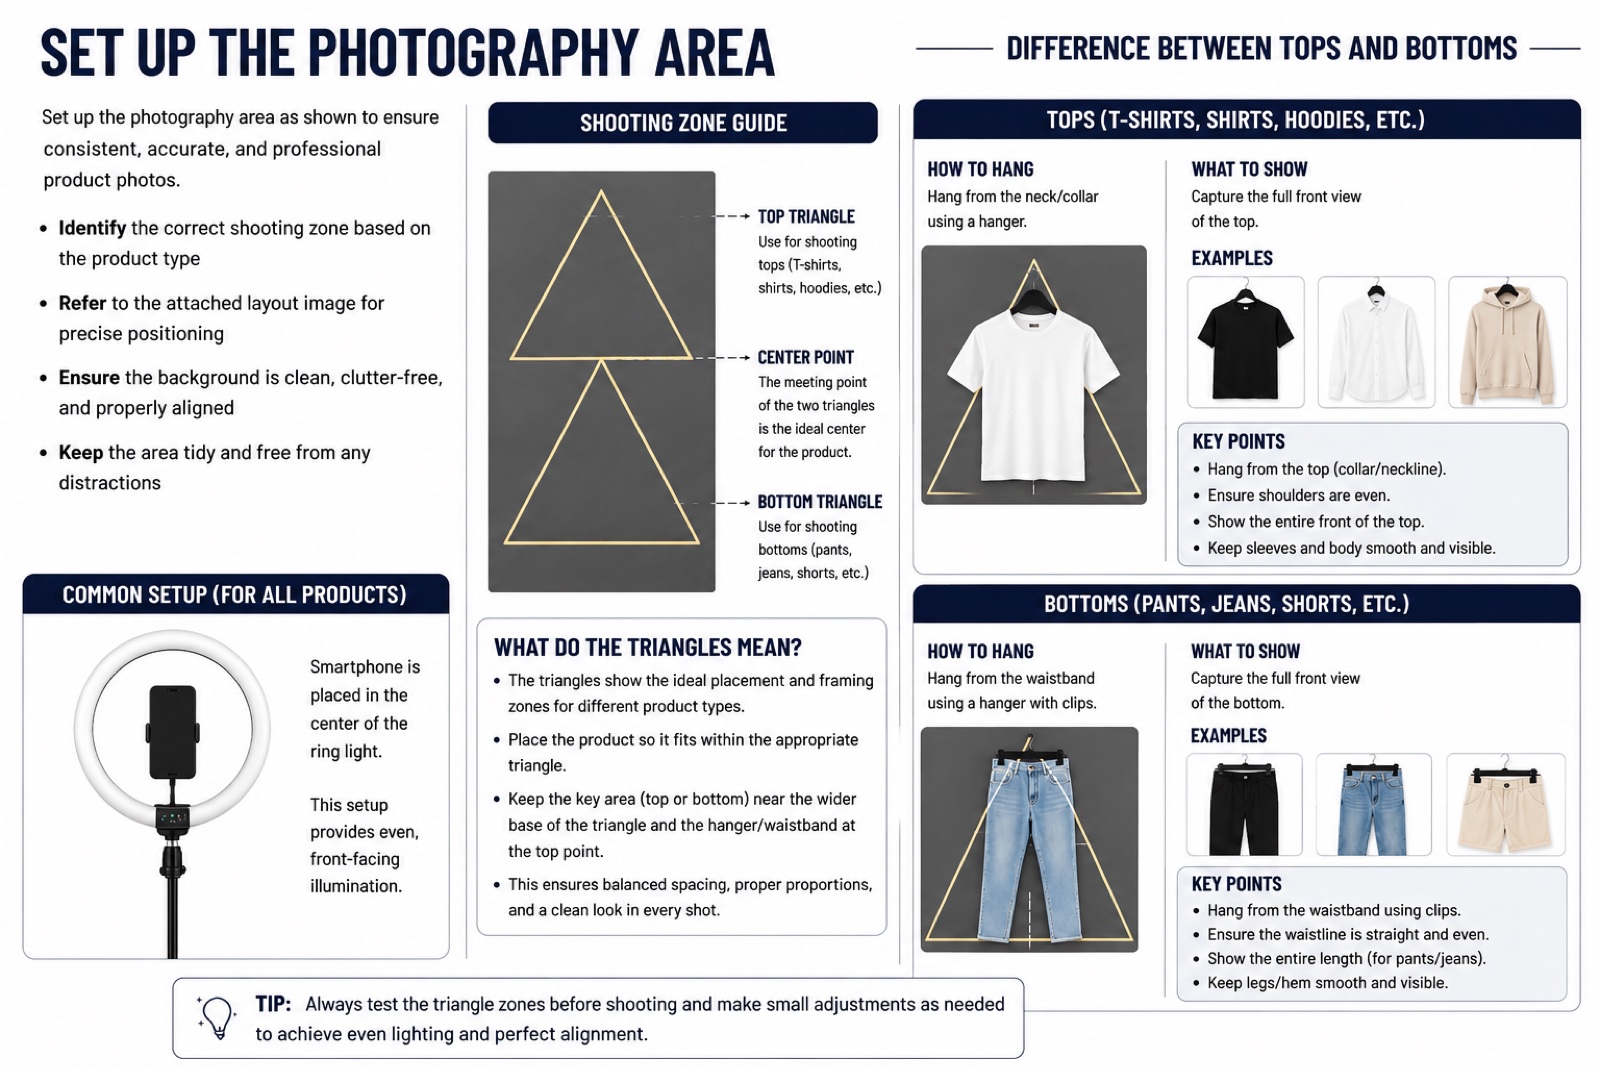
Photography staff — Position the garment in the correct zone. Use Zone 1, the front triangle, for upper-body garments such as T-shirts, shirts, jackets, hoodies, and knitwear. Use Zone 2, the rear triangle, for lower-body garments and dresses such as dresses, trousers, skirts, and shorts.
- Keep the background pure white, smooth, and free of marks and wrinkles.
- Clear every item of studio equipment, cable, object, and person out of the frame.
-
Photography staff — Set the lighting. Light the whole garment evenly with the ring light under bright white daylight.
- Check that the light shows the true colour and the true detail of the product.
- Remove harsh shadows, dark spots, and overexposed areas, and hold the same lighting for the whole session.
-
Photography staff — Configure the smartphone camera. Clean the lens and the screen, then use the rear camera in standard mode and portrait orientation.
- Switch the flash off. Switch off filters, beauty mode, portrait mode, HDR, AI enhancement, colour effects, and digital zoom.
- Use the standard 1x lens. An ultra-wide lens distorts the garment proportions.
- Select the highest available image resolution.
- Switch grid lines on: on iPhone open Settings, then Camera, then turn on Grid. On Android open the camera app, then Camera Settings, then turn on Grid Lines.
- Tap and hold the product on screen to lock focus and exposure, and adjust the exposure manually when the product looks too bright or too dark. On iPhone, switch Live Photo off.
-
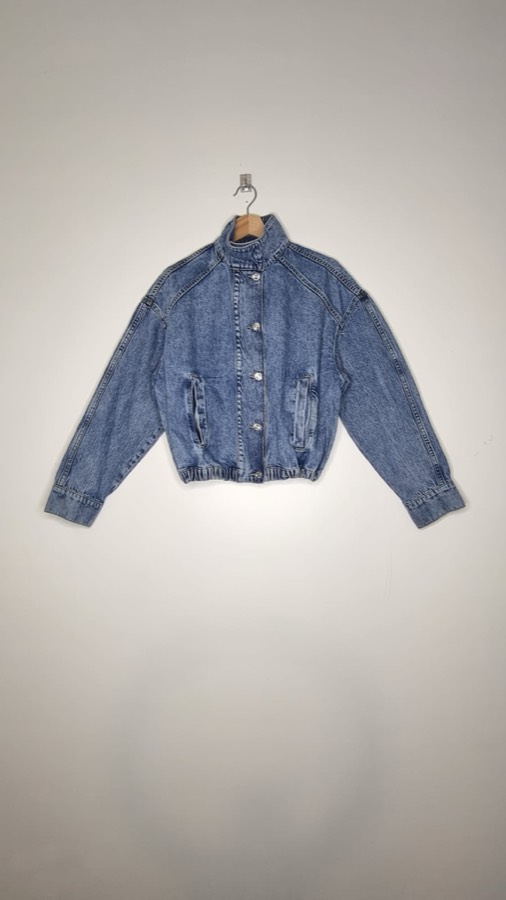
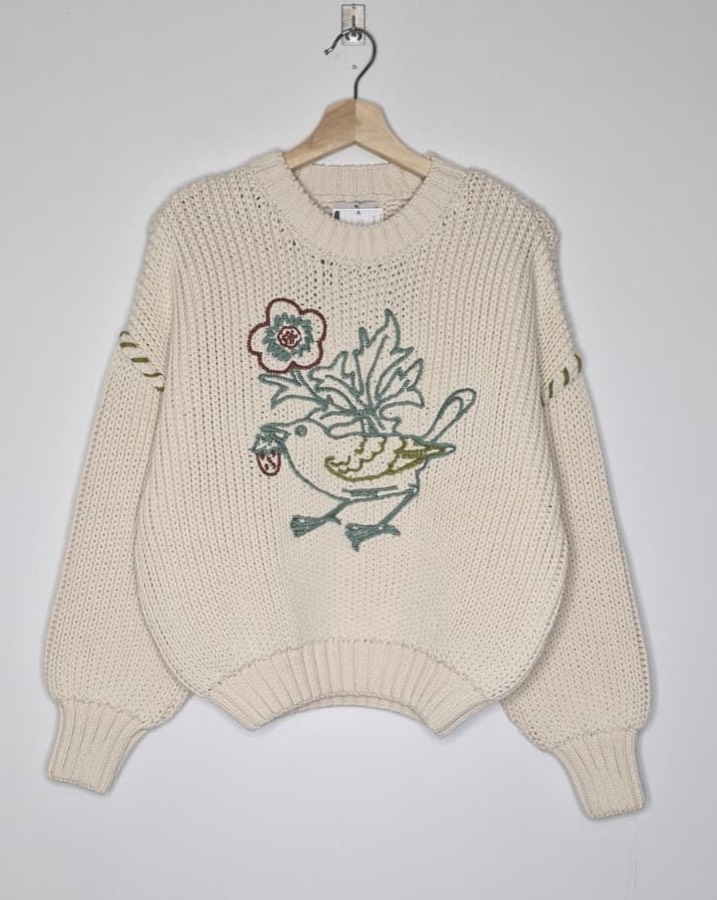
Photography staff — Frame and shoot. Stand directly in front of the product and hold the phone parallel to the garment at a 90-degree angle.
- Centre the garment in the frame and leave even spacing around it.
- Hold the same shooting distance for every product, and take several shots.
- Do not shoot from a high, low, or side angle.
-
Photography staff — Review and save the images. Check the sharpness, the lighting consistency, the garment condition, and the absence of tags and distractions.
- Retake the photograph when any check fails.
- Save the approved images to the correct folder under the approved naming convention.
-
Visual Content Supervisor — Approve the images. Confirm every point of the quality checklist before the images go into use.
-
The product is clean and ironed, and it hangs on a wooden hanger.
-
The background is pure white, no tags appear, and no shadow or distraction appears.
-
The lighting is even and natural, the camera angle is straight, and the product sits centred in the correct zone.
-
The image is sharp and high resolution.
-
Return a failing image to the photography staff with the reason, and provide retraining where the same fault repeats.
-
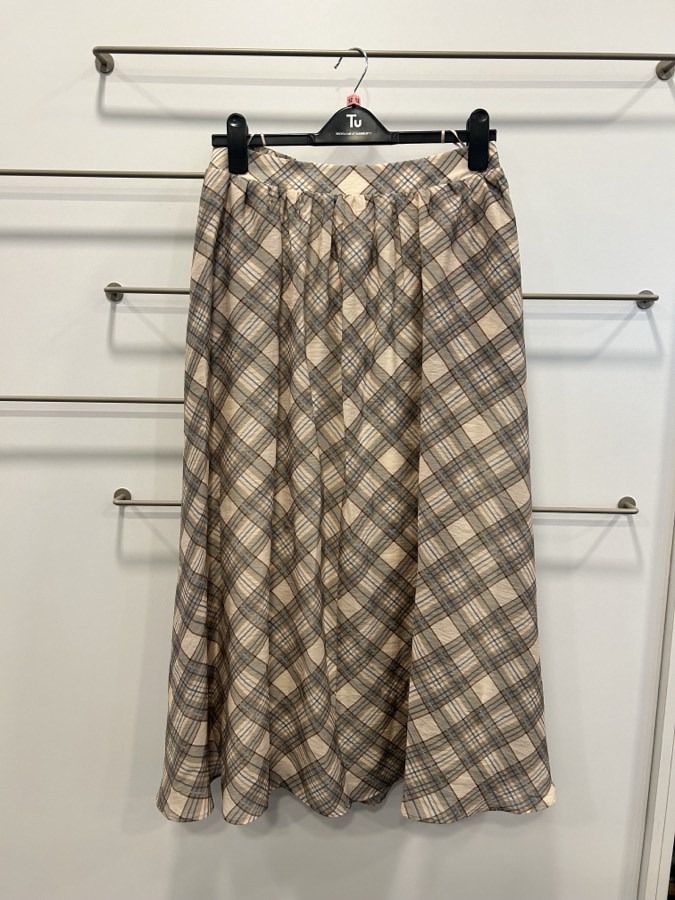
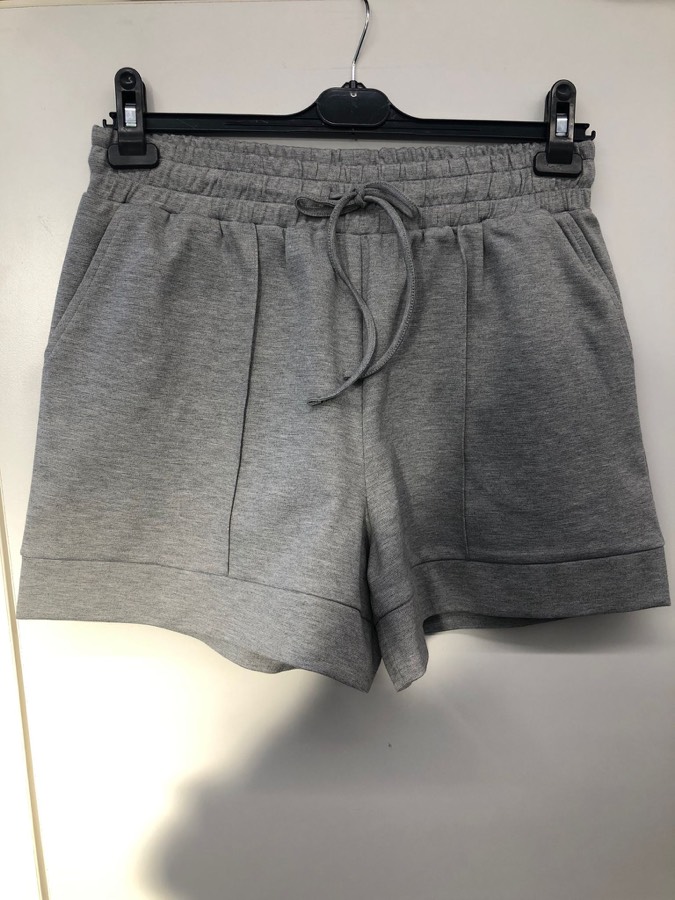
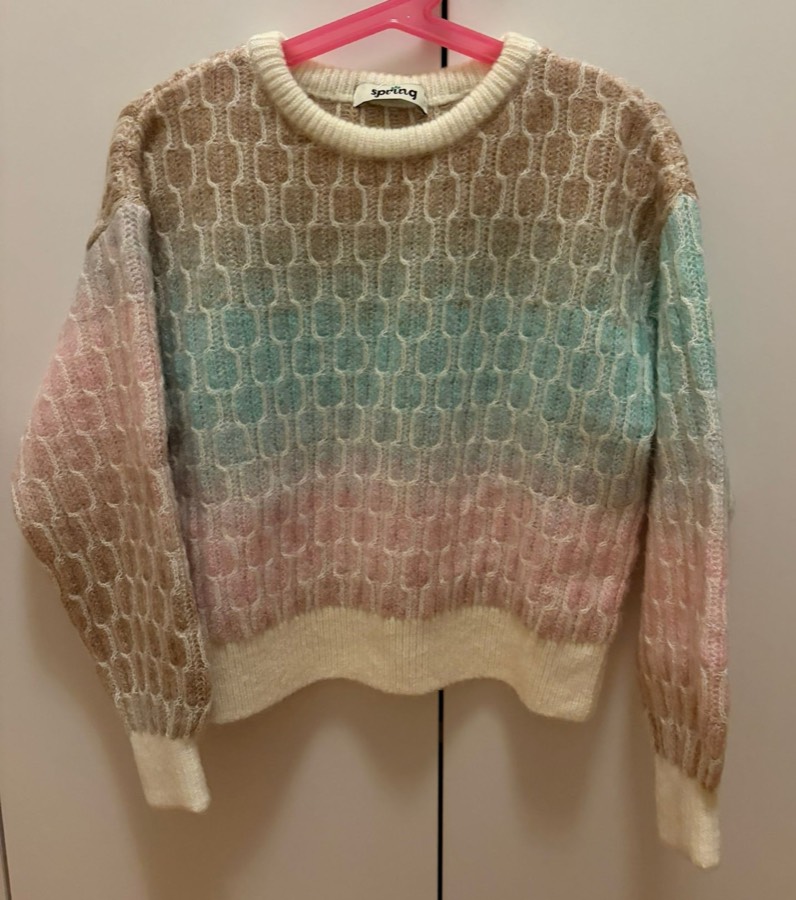
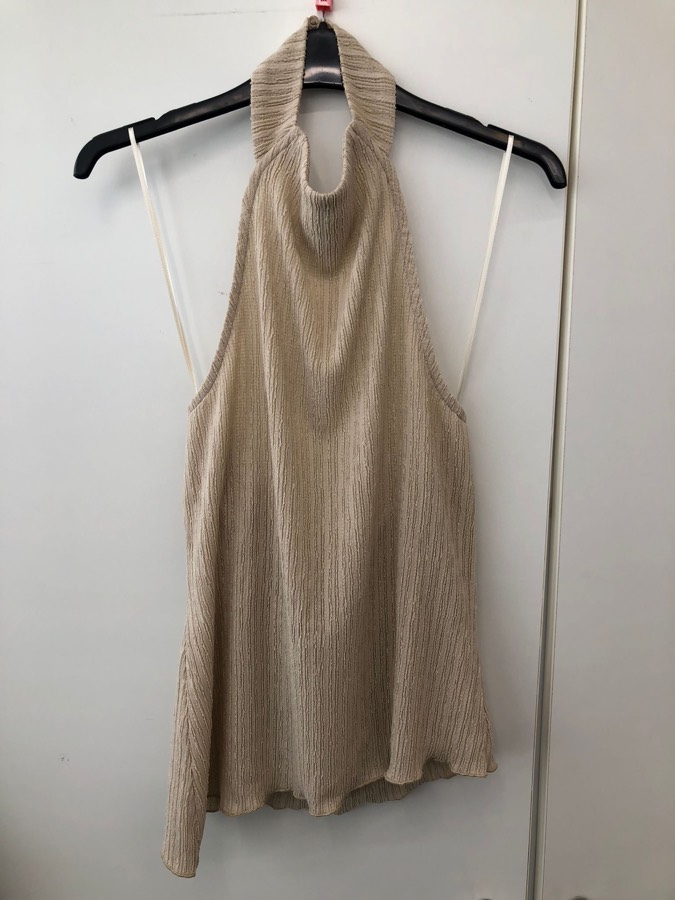
The four photographs below fail the checklist: a distracting background, harsh shadows, the wrong angle on a plastic hanger, and a two-piece garment shot as one item.
-
Workflow
Presentation
Product Photography Presentation
Tutorial
This training video supports the Product Photography with Ring Light process. It does not replace the numbered steps.
Admins will add a Microsoft Stream or SharePoint watch URL when the tutorial for Product Photography with Ring Light is ready.
Exam
| Pass mark | Expected duration | Attempts |
|---|---|---|
| 80% | Admin will provide this soon | Admin will provide this soon |
The exam is not published yet. Admins will add it here when the assessment is ready.
Changelog
Changelog
| Date | Changed by | What changed |
|---|---|---|
| 2026-09-21 | Design Team | Added a Presentation section with the Product Photography Presentation link before Tutorial. |
| 2026-09-21 | Design Team | Article Added from SOP 3.3 Product Photography with Ring Light. |